Project Grave Digger: Battery & Wiring Upgrades
Completely re-wiring Grave Digger and adding new features

Picking up where I left off, Grave Digger has been tearing up the streets for over a year at this point and its rear wheels are on their last legs. With each revolution there’s an annoying “click” due to the cracks in the wheels overlapping and snapping back into place. If Grave Digger is going to keep rolling something needs to be done about its wheels. Which is exactly why I decided to build Grave Digger a new battery…
Stick with me, this will make sense, I promise. Since we got Grave Digger he’s been powered by two 18V Ryobi batteries in series. This bumps the power to 36V and provides a nice speed boost and quick charging capabilities. What it doesn’t do is prolong or preserve the life of the Ryobi batteries. Quite the opposite in fact. At this point I’ve fried 4 batteries, recovered two by soldering on new circuit boards, and recycled the other two. If Grave Digger is really going to be the vehicle I imagine then we need a more robust power source.
When considering my options for batteries I felt I had three:
- Li-ion
- LiFePo4
- SLA (sealed lead acid)
I ultimately settled on SLA for a few simple reasons. Simplicity, cost, and safety. I’m sure I could have got a Li-ion battery to work but it would have been a lot more expensive and I also would have had to figure out the whole BMS and charging situations, which just felt like a tangent I wasn’t ready to go on. Similarly, I know LiFePO4 batteries are more robust that Li-ion and I did seriously consider them but you also pay for that robustness. At the end of the day, whether it was standard Li-ion or LiFePo4 I wasn’t confident in my current abilities, or interested in gaining new abilities (yet), to ensure the battery pack wouldn’t become a bomb under my son’s ass. So, at the end of the day, I went with tried and true SLA batteries. These are the same type of batteries that Grave Digger originally came with and they’re the same kinds that are used in any CE approved Power Wheel. If they fail early or they just aren’t giving me the performance I’m after I can always revisit the batteries at a later date.
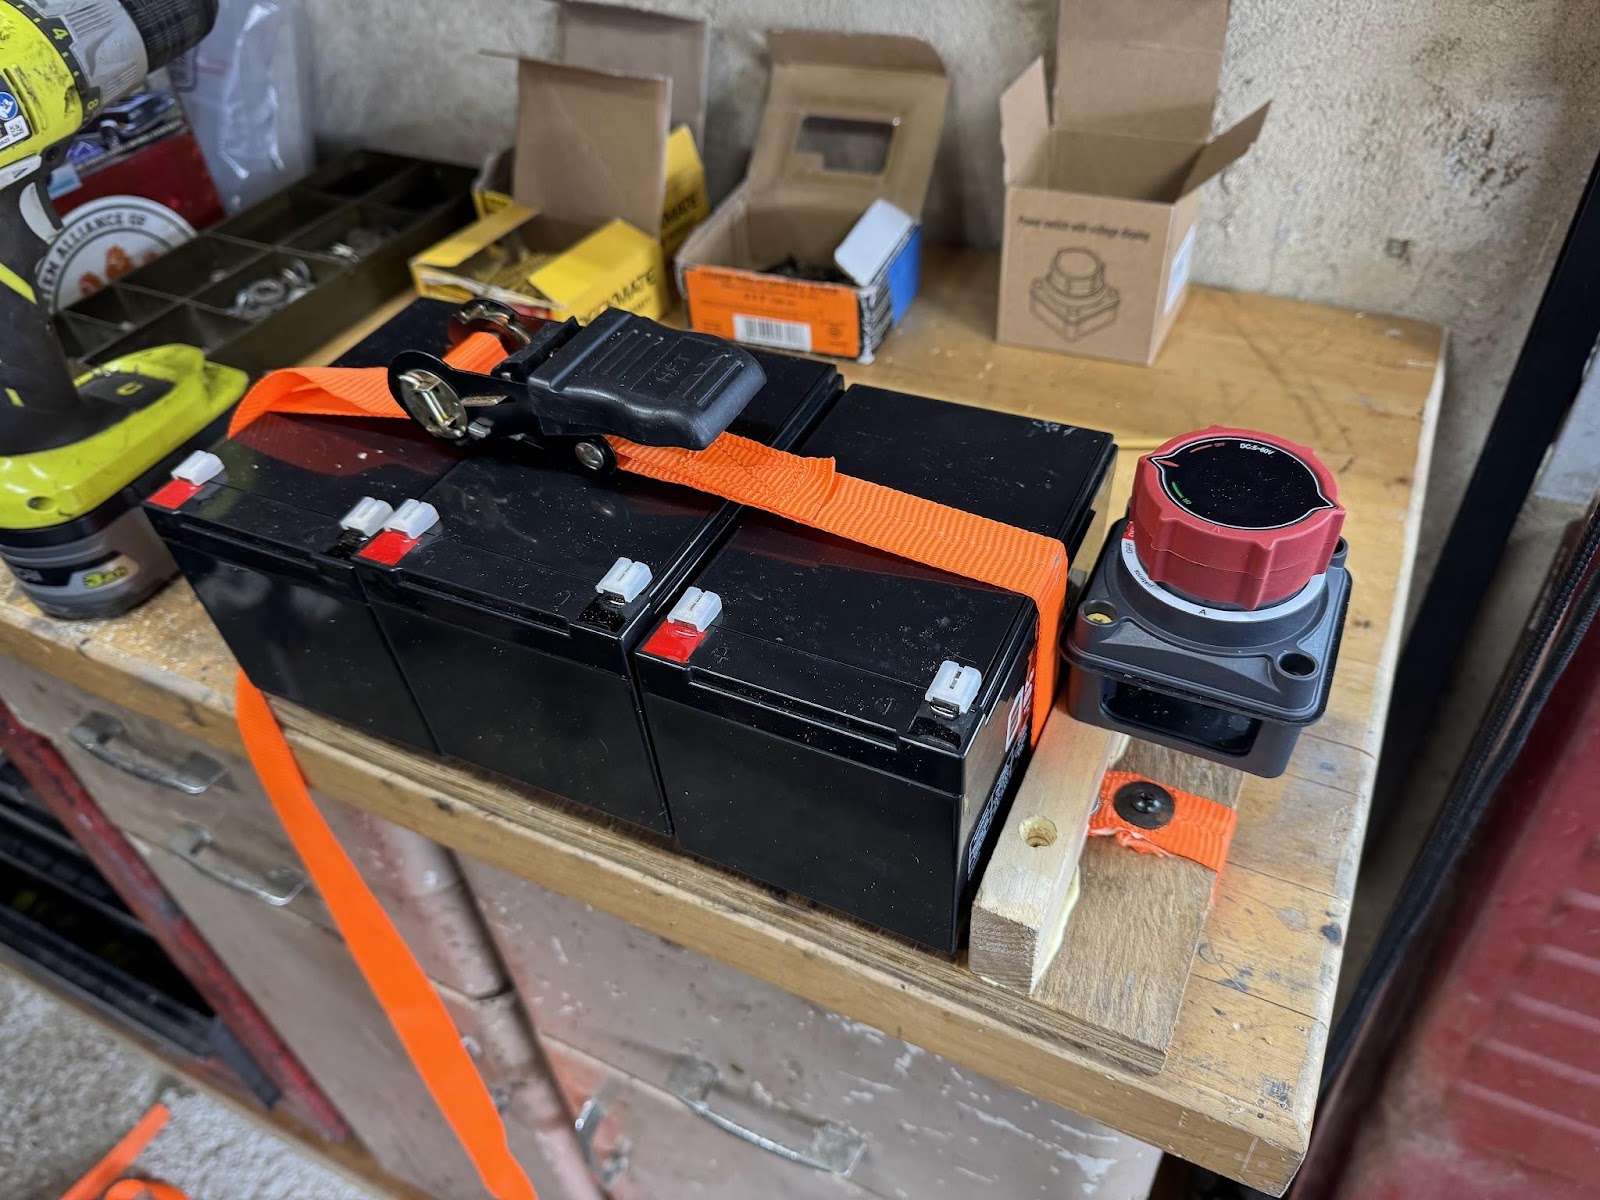
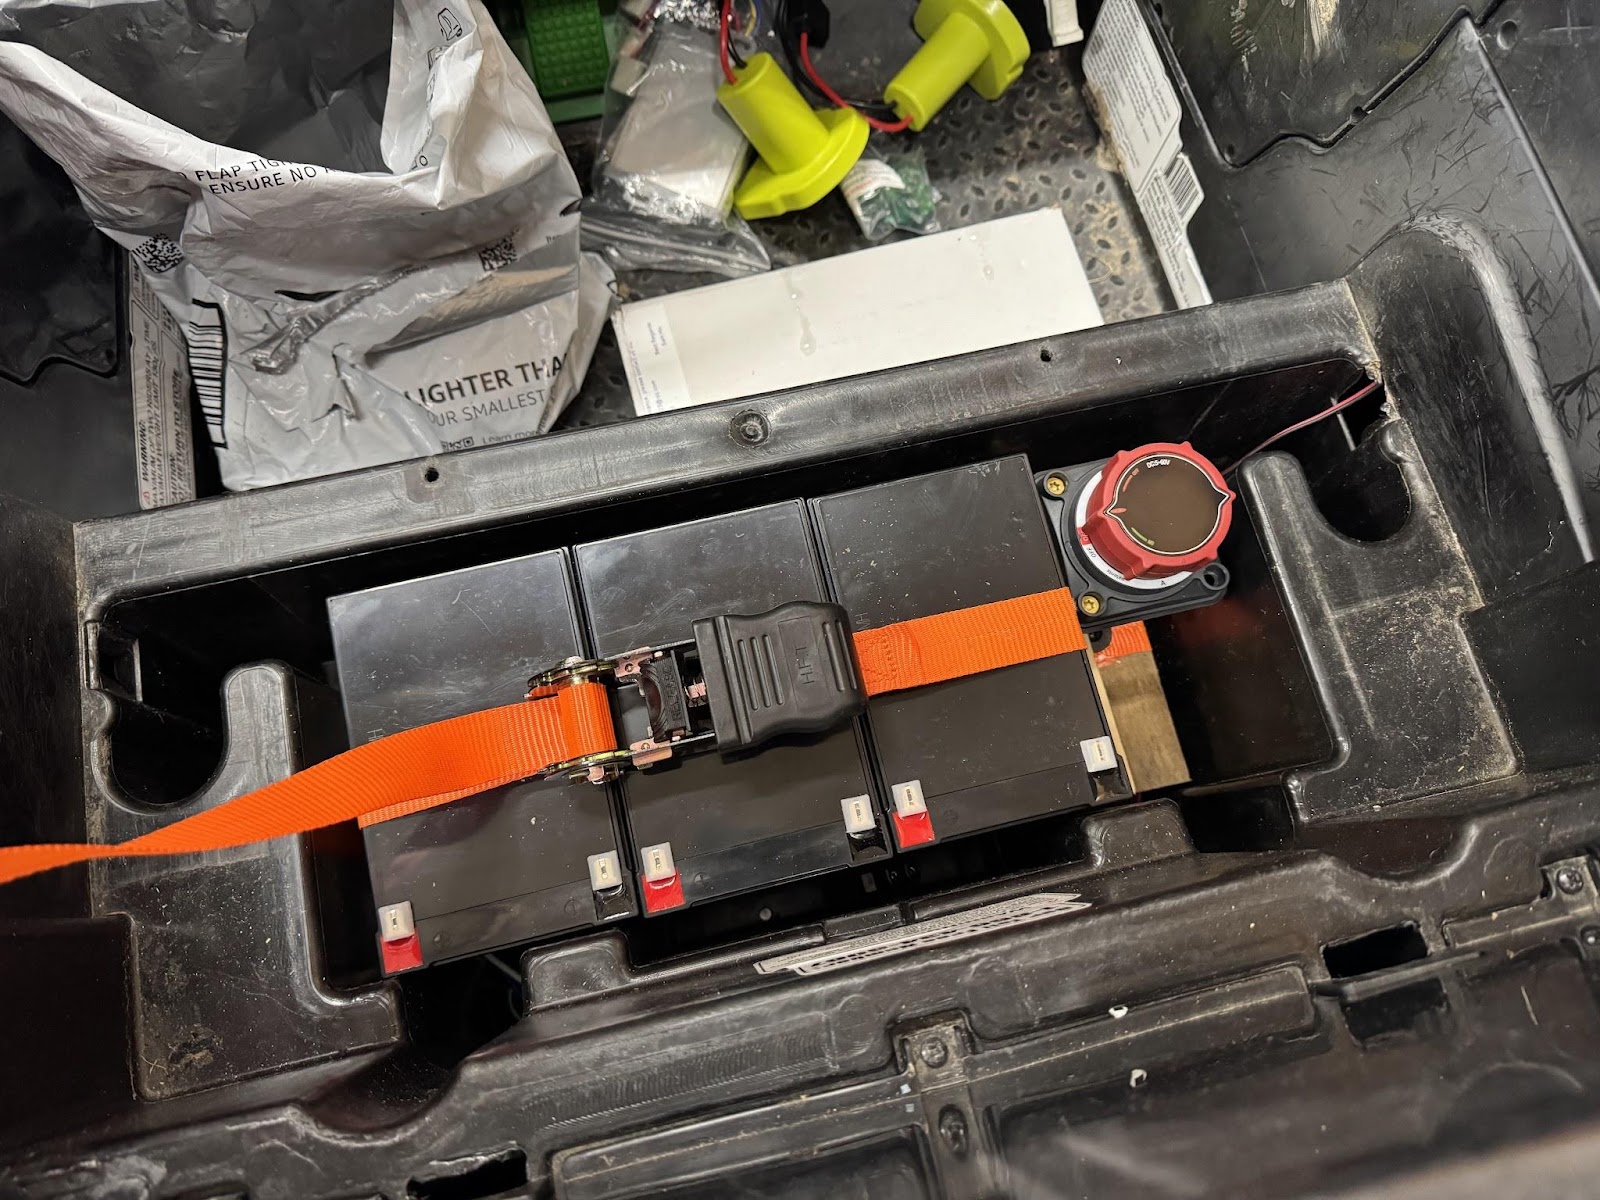
I bought three 12V 15Ah SLA batteries. Wired in series, this gets me back to the original 36V and also increases my Ah threefold. I used a scrap piece of wood and a ratchet strap to fashion a simple battery mount..
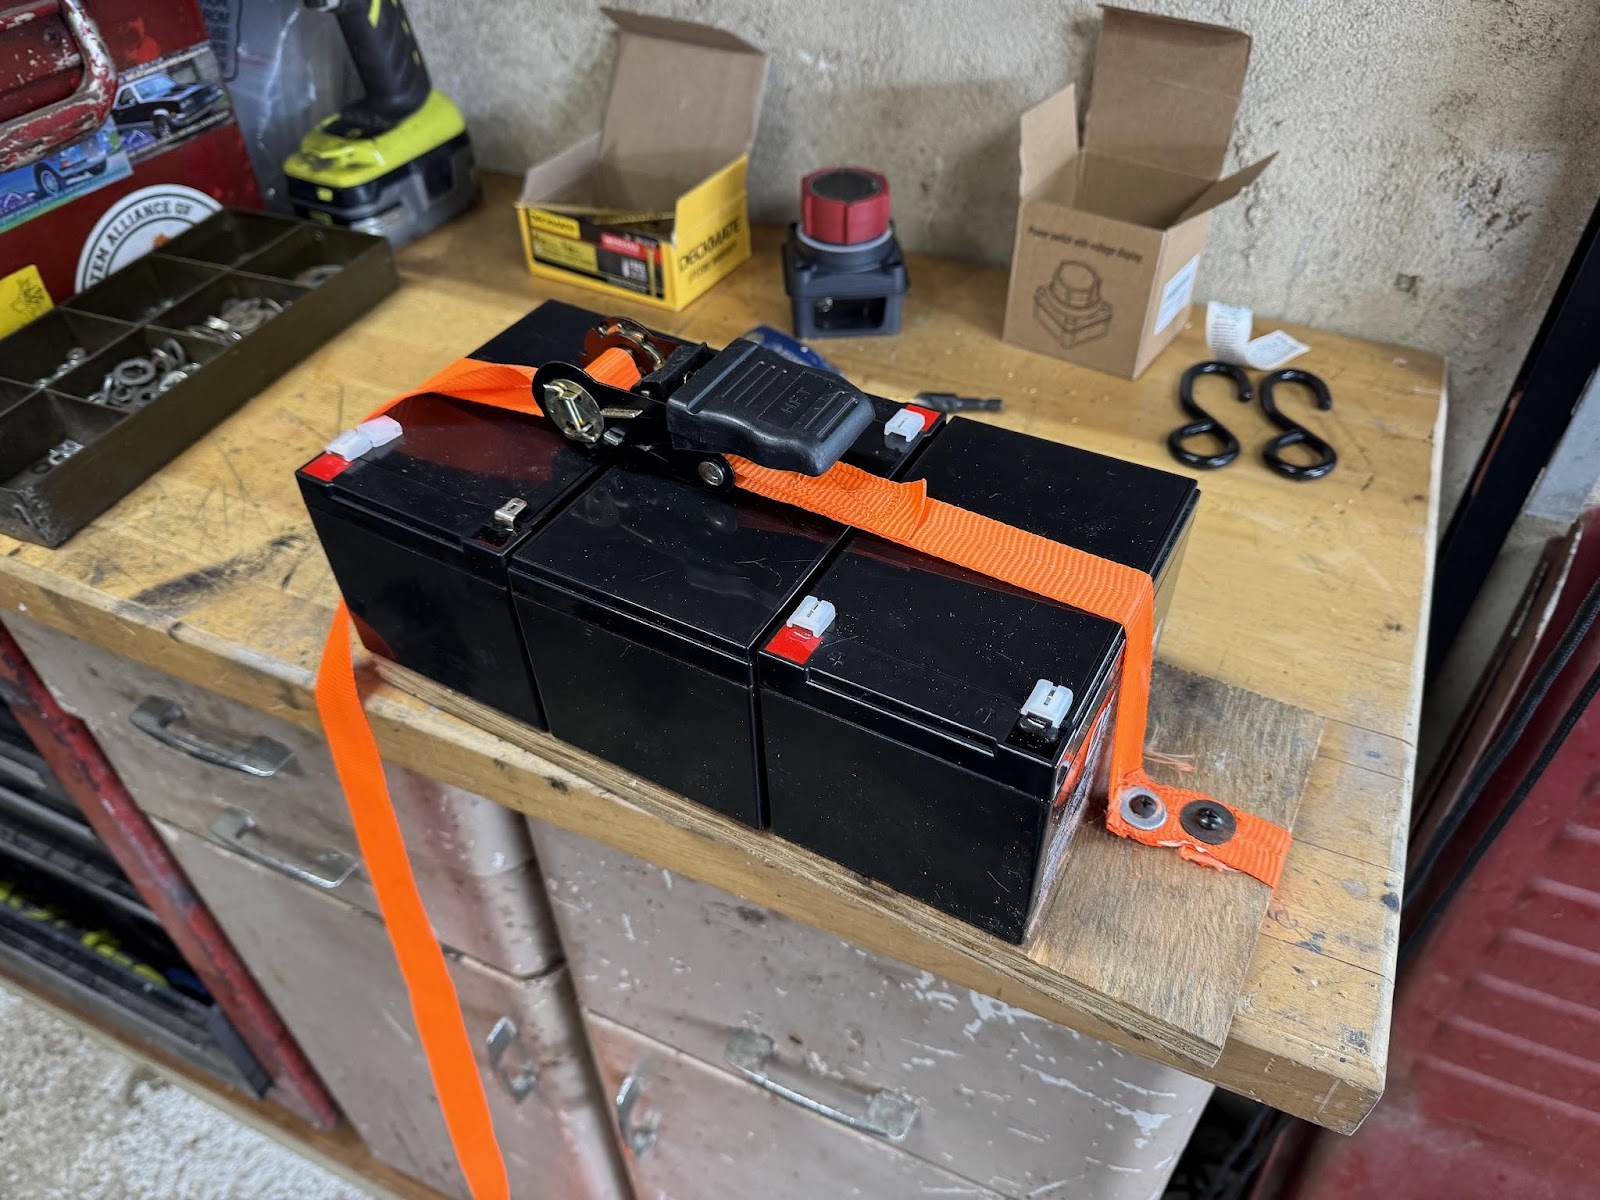
Add on a few more pieces of wood and a combo cut-off switch/voltage monitor and the battery pack is done. I eventually ditched the cut-off switch because it was buggy and more trouble than it was worth. I wired in a separate cut-off switch and battery monitor on the console of Grave Digger so this really was redundant.
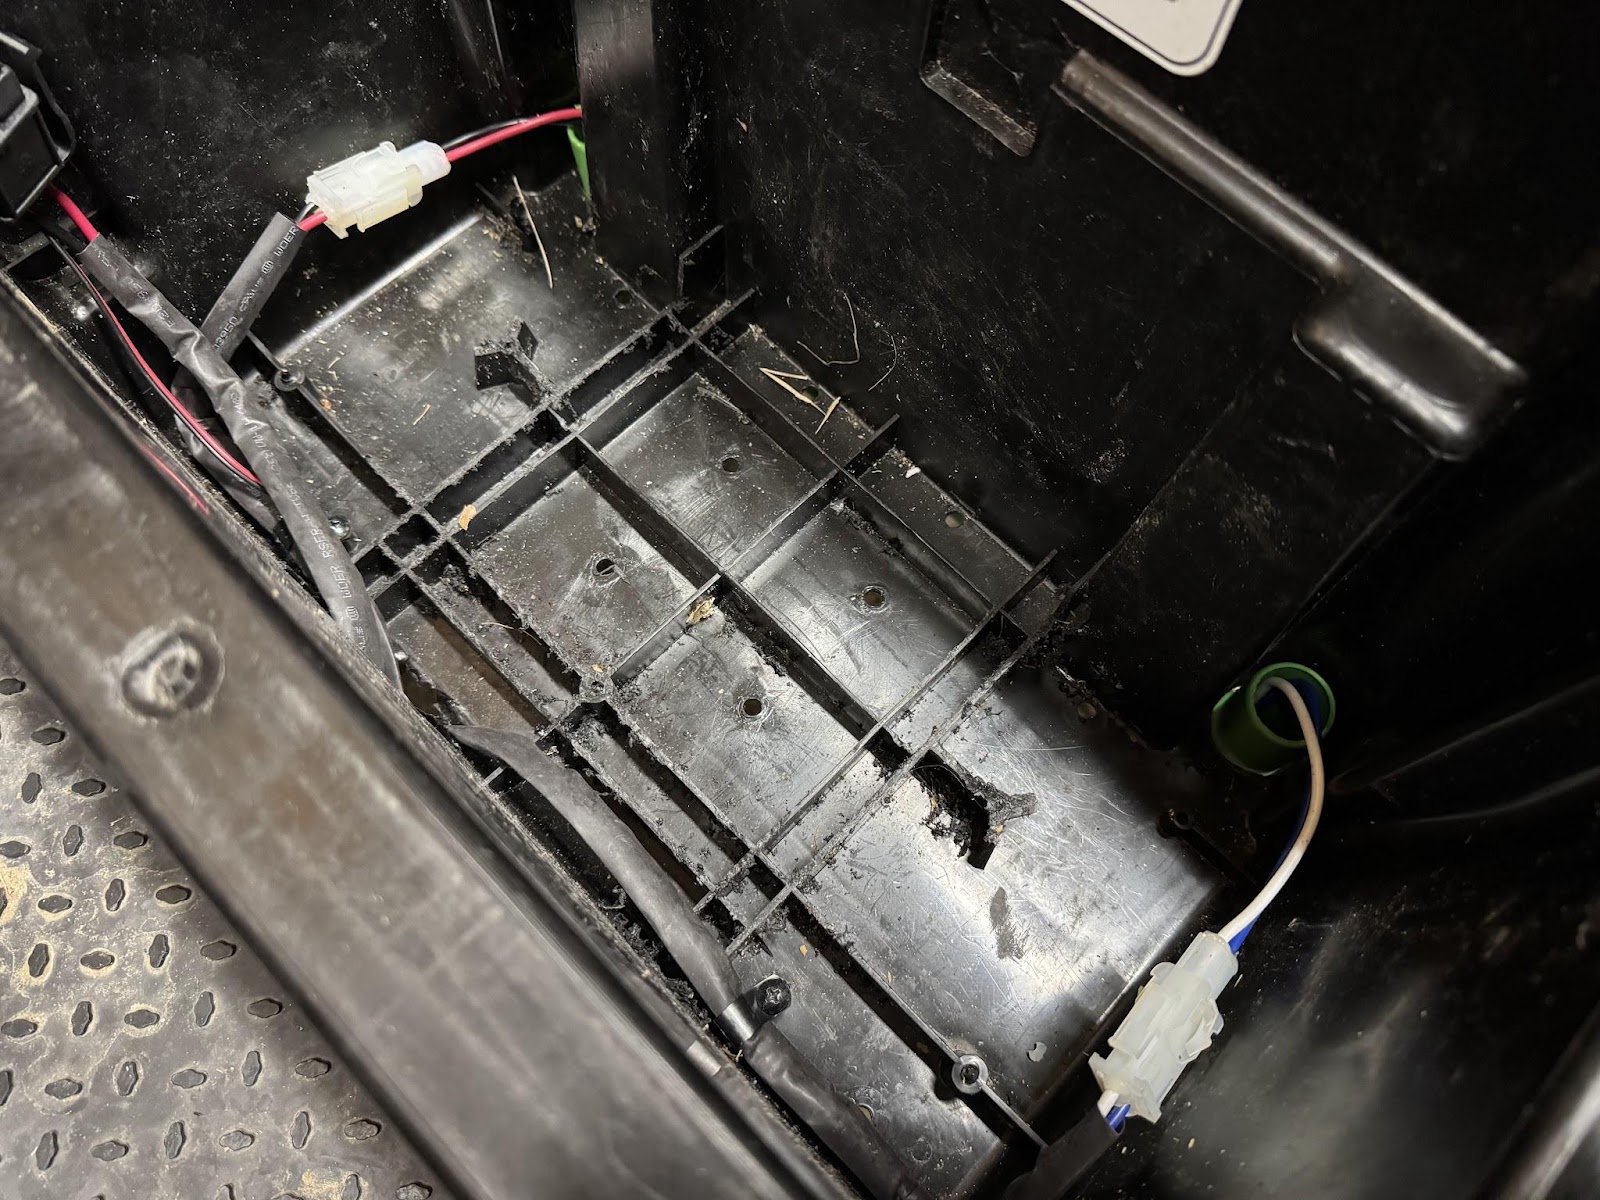
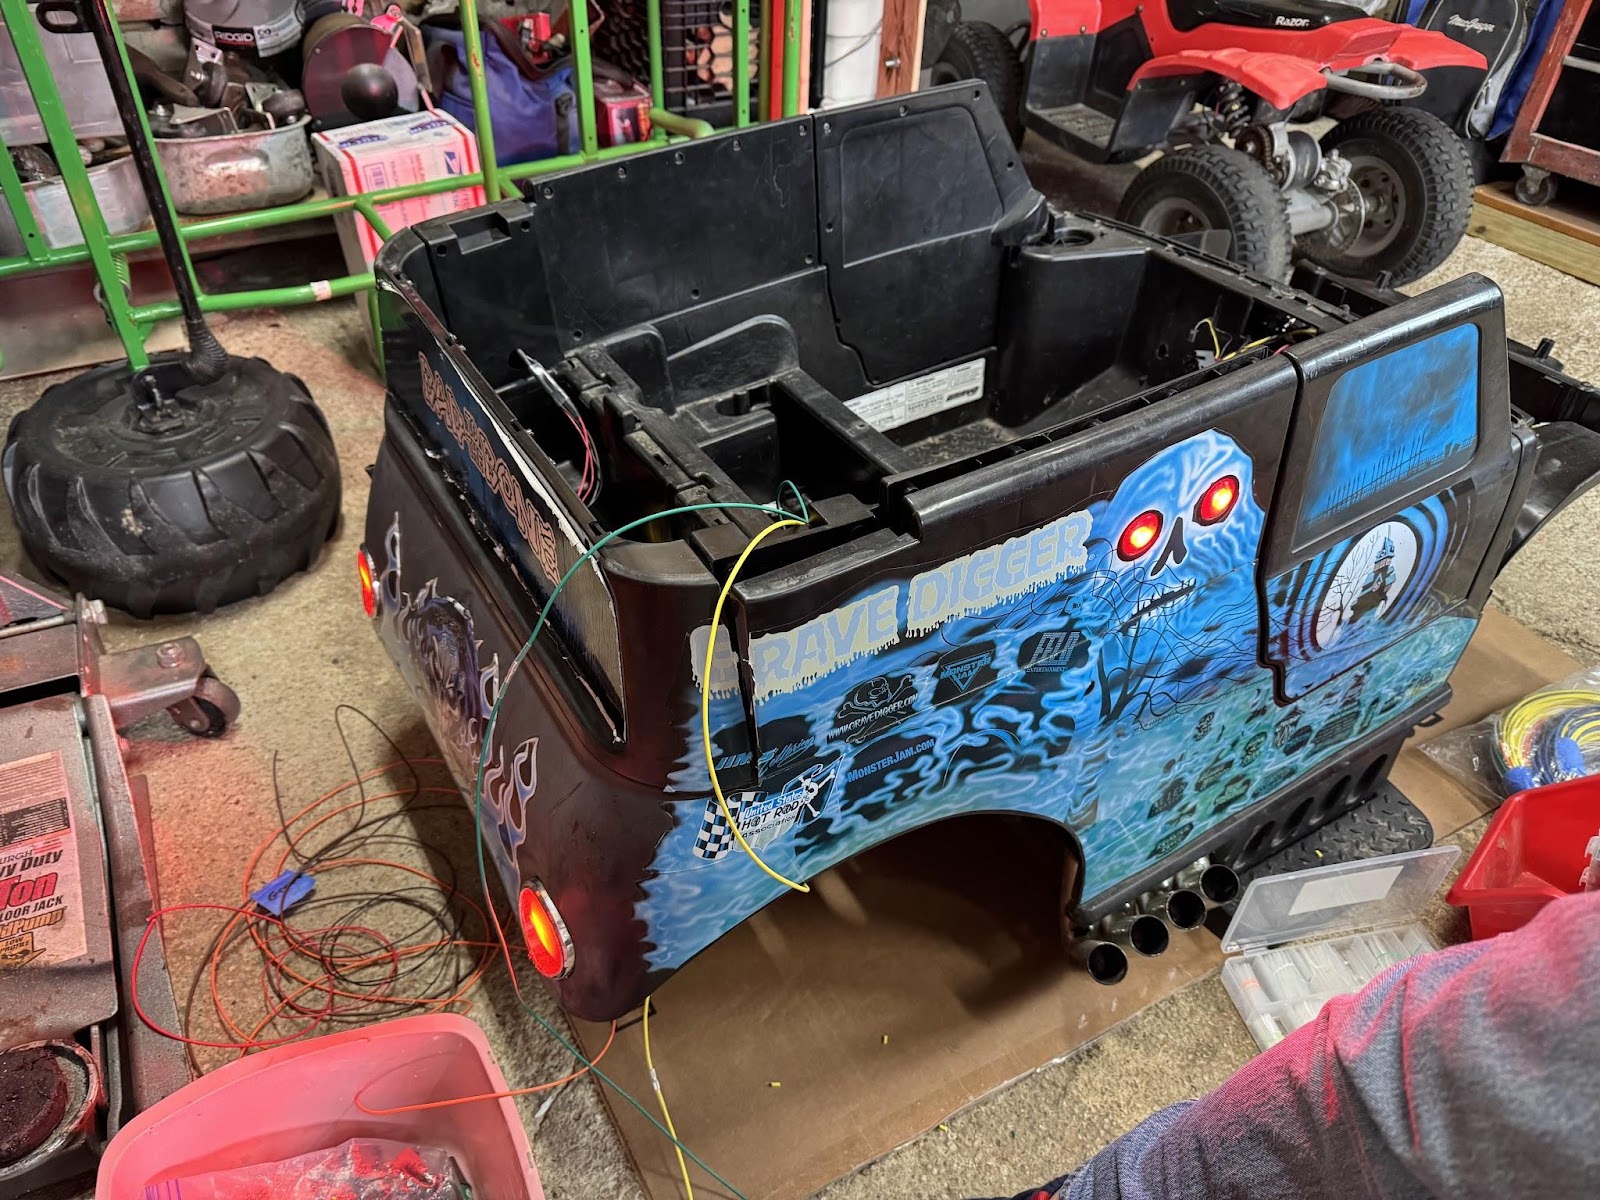
I took extra effort not to hack up the body of Grave Digger throughout this process. This thing is obviously not going to be stock anymore but that doesn’t mean I want to cut and drill into it without considering the ramifications on aesthetics. In the case of the stock battery location, I needed to cut down the ribs at the bottom of the battery box to accommodate the extra height of my new battery. I specifically selected the SLA batteries for their dimensions. I knew I would be able to get three of them in the stock battery location without extensive modification. Below you can see some of the jagged plastic where I shaved down the reinforcement ribs at the bottom of the stock battery well. I used an oscillating multi-tool with a bent blade to easily cut through the plastic. I’m sure you could use a dremel with a small cut-off wheel too.
My new battery fits exactly how I expected and I can still put Grave Digger’s stock seat right back in place.
Now, I realize I still haven’t explained how new batteries solve the issue of failing rear wheels. Well, in conjunction with the new batteries, I added a real accelerator pedal. No more on/off from the stock pedal. Instead of just spinning the wheels from the get-go I hoped my son could modulate his acceleration and hopefully prolong the life of the tires for a little longer. And given I was planning on getting more life out of the existing wheels, I figured he should be able to drive for as long as possible, hence the battery upgrade. You with me?
I used some ¼” HDPE plastic sheet to make a mounting plate for the new accelerator pedal. It’s a direct replacement for the stock pedal.
With the wires correctly routed it looks factory.
As I started digging into the wiring of Grave Digger I realized it is a little more sophisticated than some of the other Power Wheels I’ve worked on. There are circuit boards that route power and control the buttons on the dashboard for things like the sounds and the lights.

There is also a 3 speed (forward low, forward high, reverse) shifter and additional circuit boards in the rear (not pictured) that handle power distribution for the rear and side lights. Now, I knew that I was going to have to do some rewiring to add the variable speed pedal, but once I saw all this nonsense I decided I’d rather just replace it all and jump in with two feet. While you’re in there right…
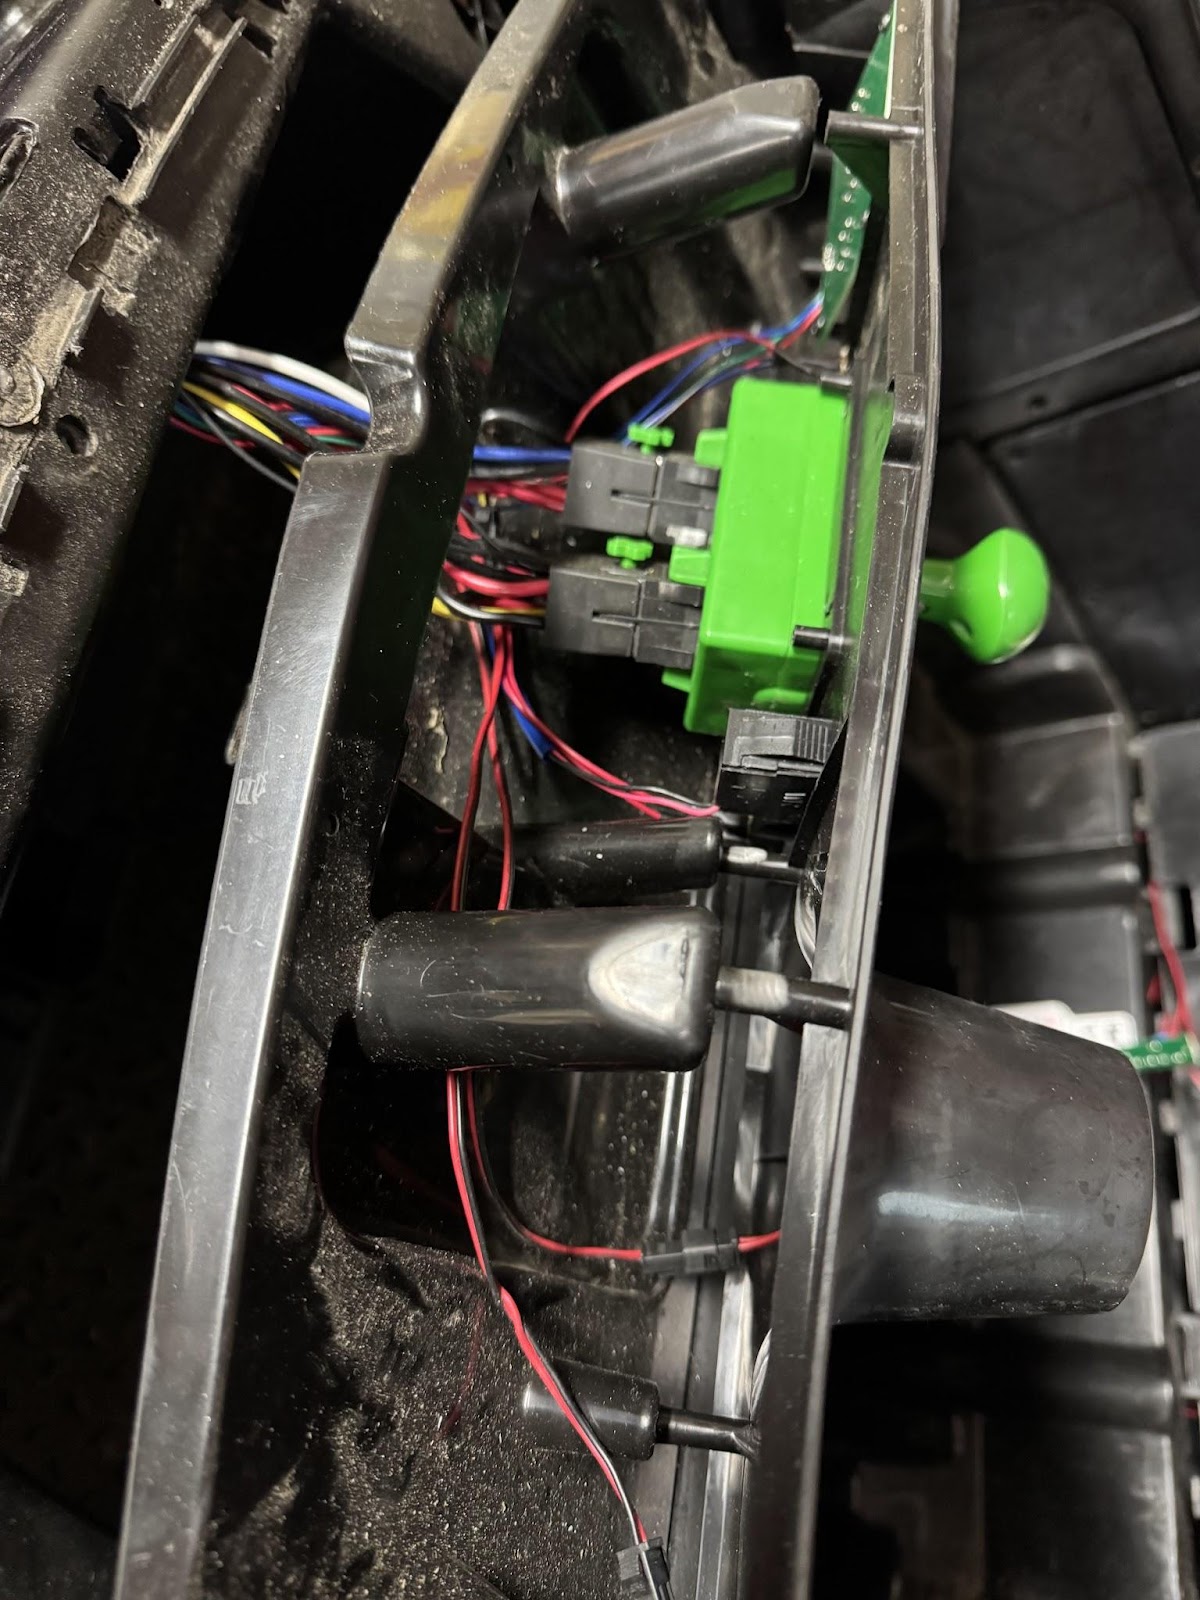
I took advantage of the unused area in the front of Grave Digger to house all of the new electronics I was planning on adding. The silver box is the variable speed controller that works in conjunction with the new pedal. The smaller blue box is a 36V to 12V converter. I also added positive and negative power distribution blocks, because I decided to add some additional 12V accessories.

Like a battery meter, and a horn, and a GPS speedometer…
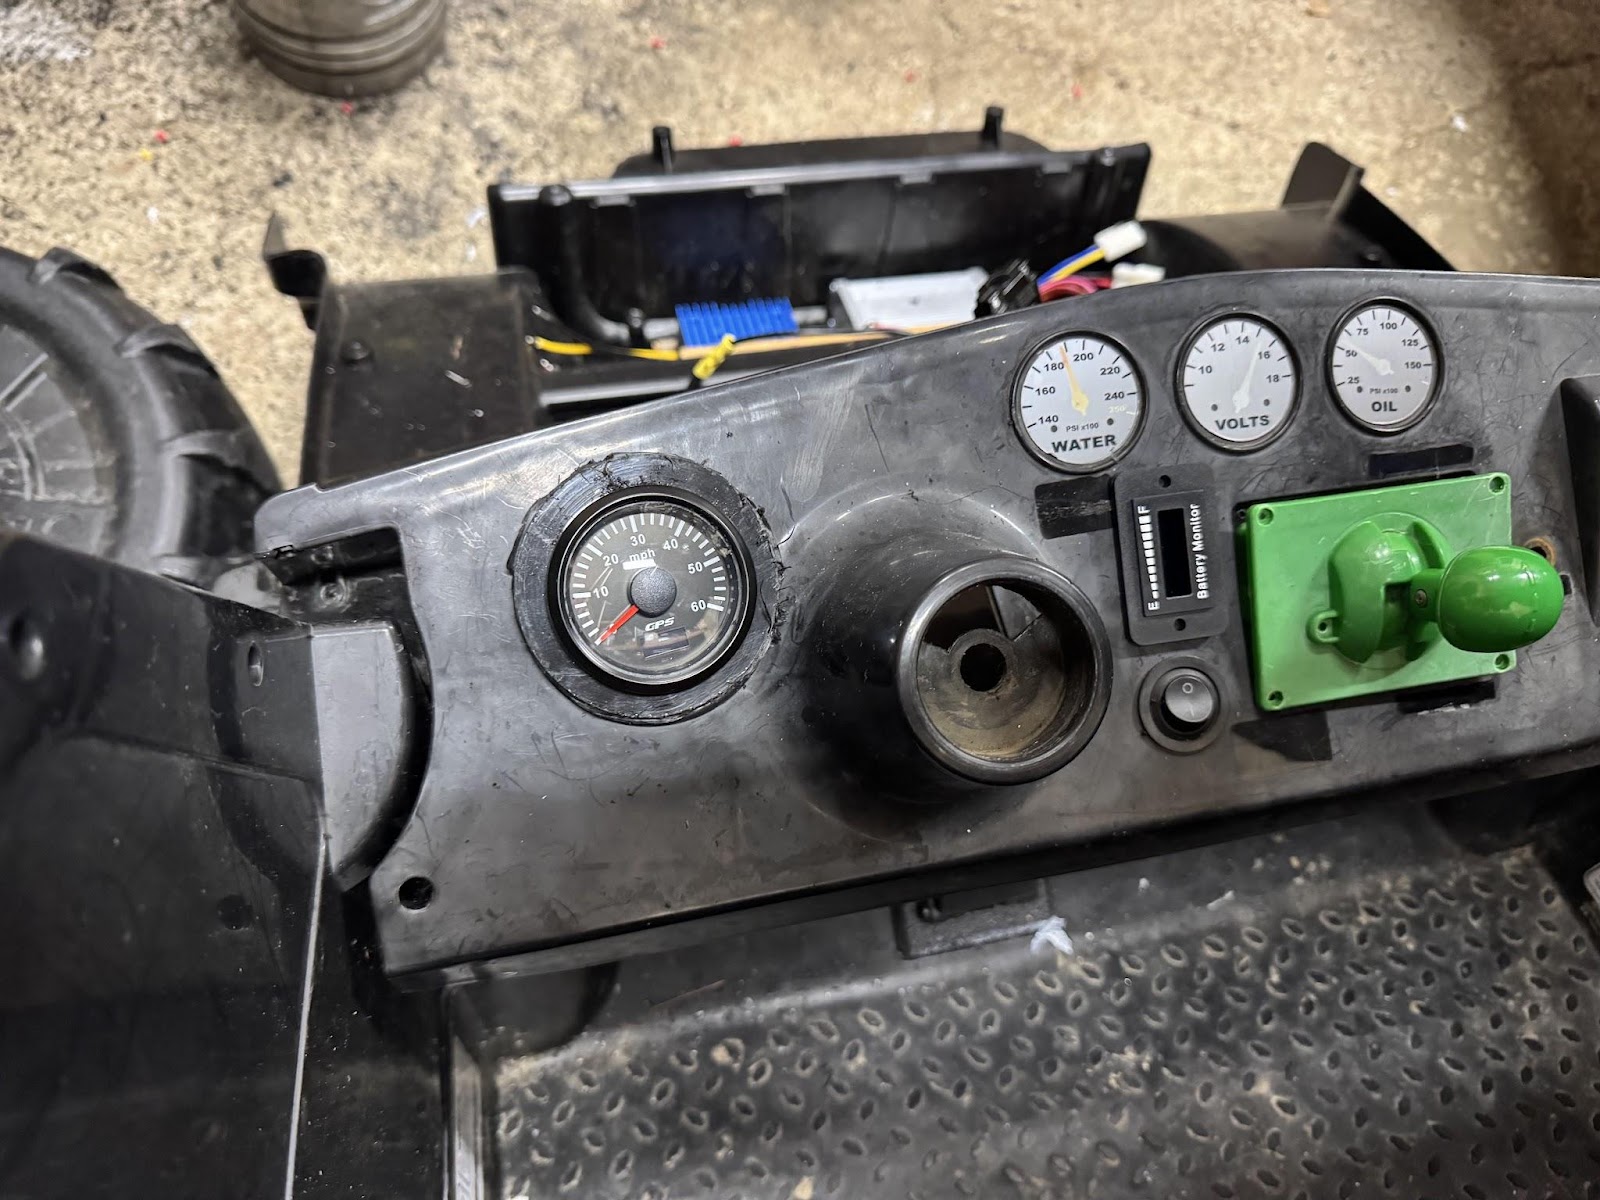
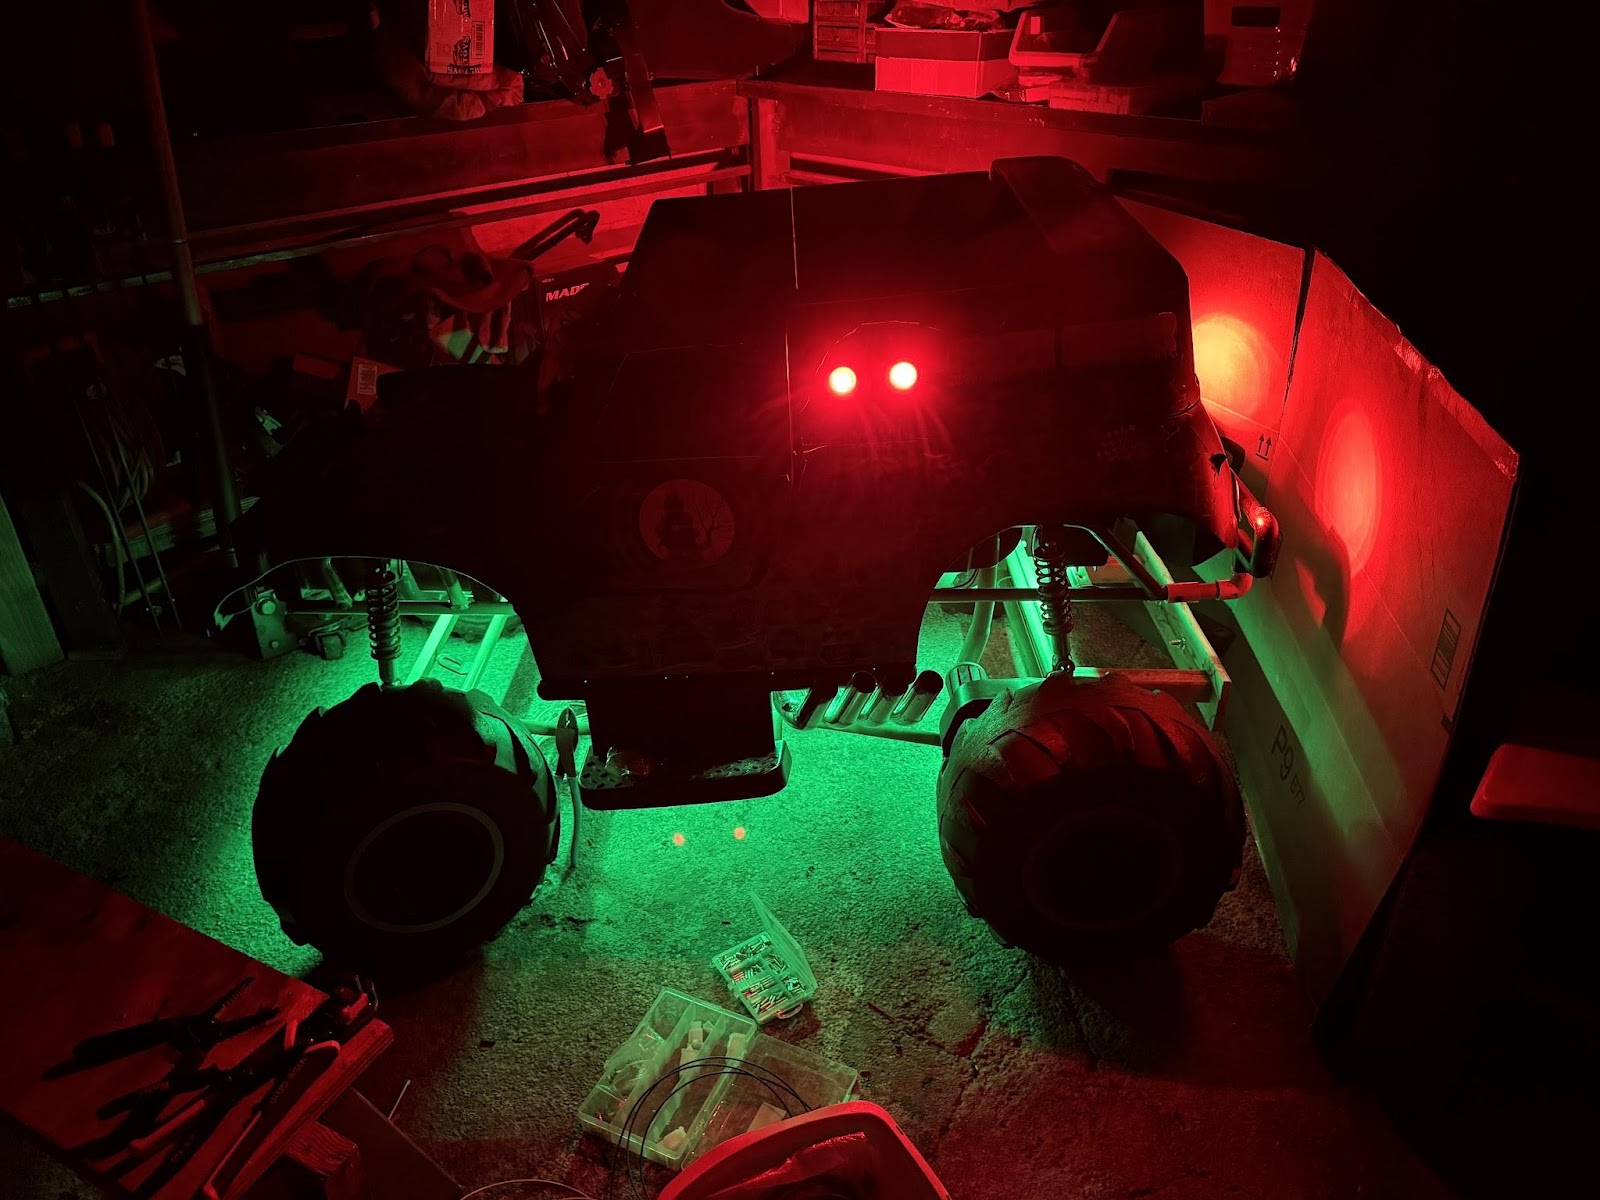
And all new 12V red LEDs for the lights
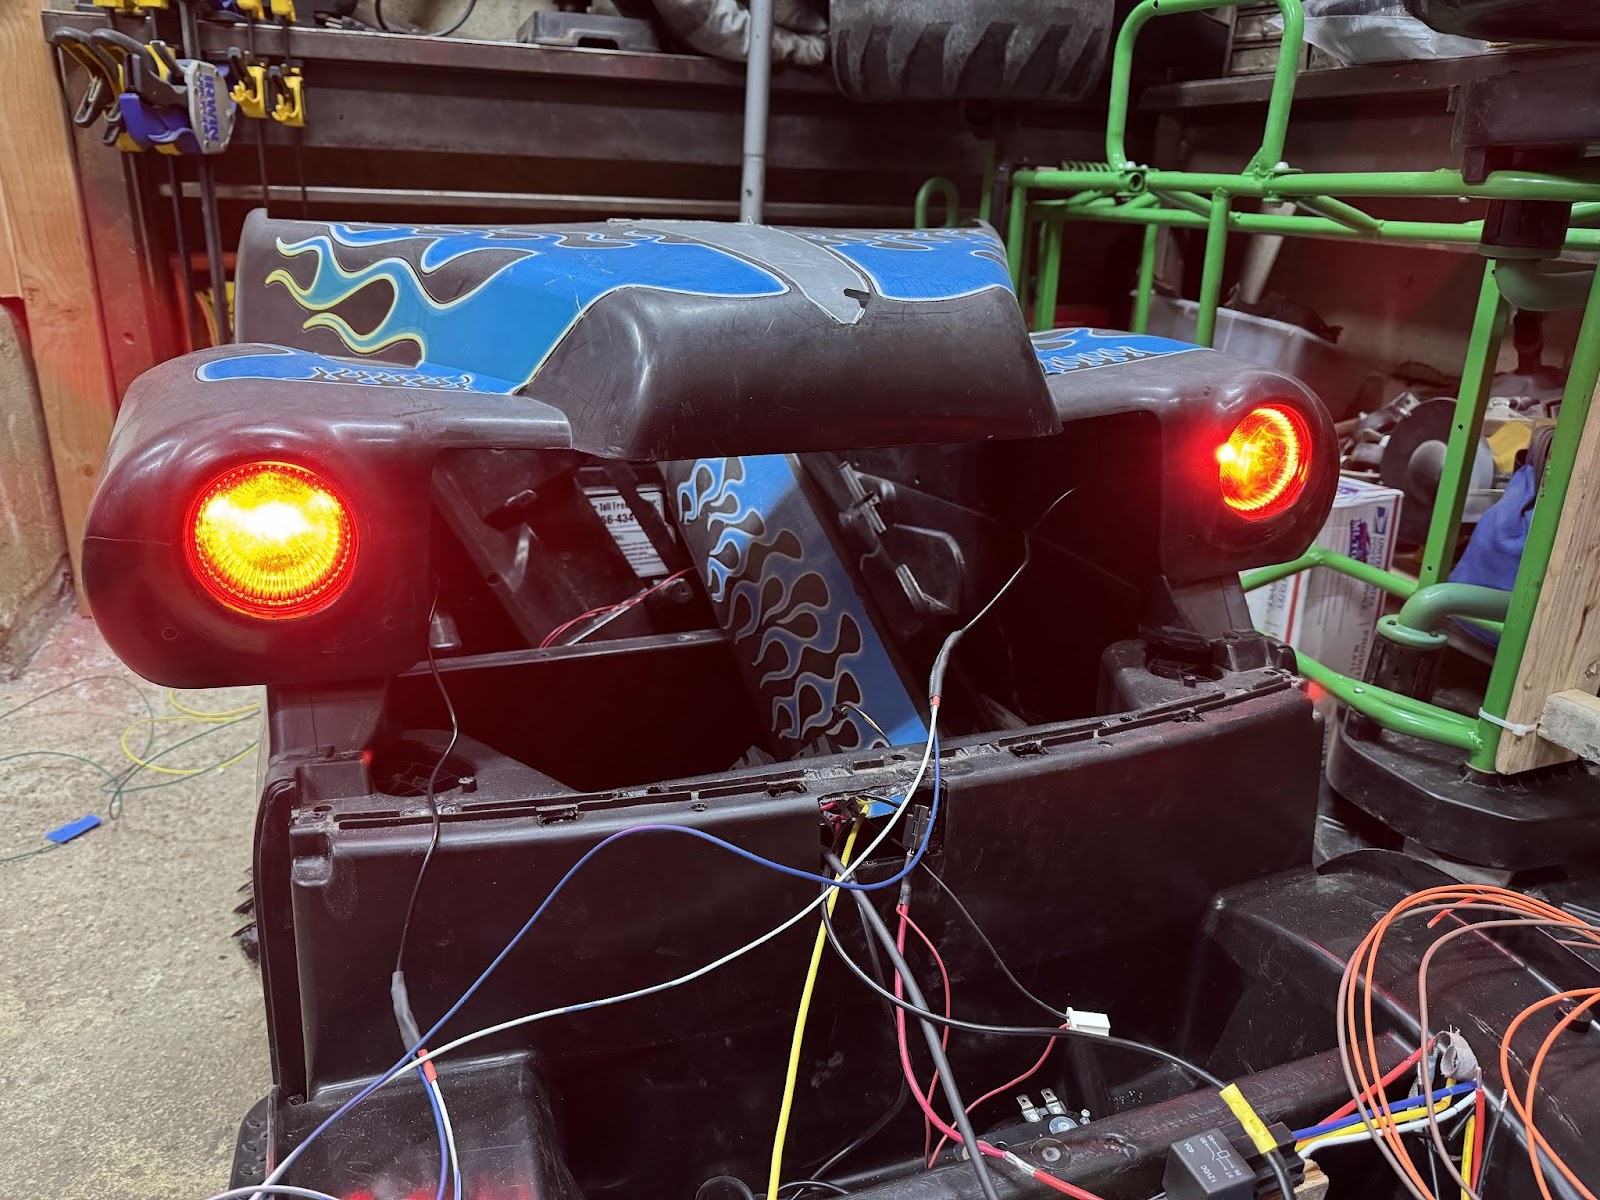
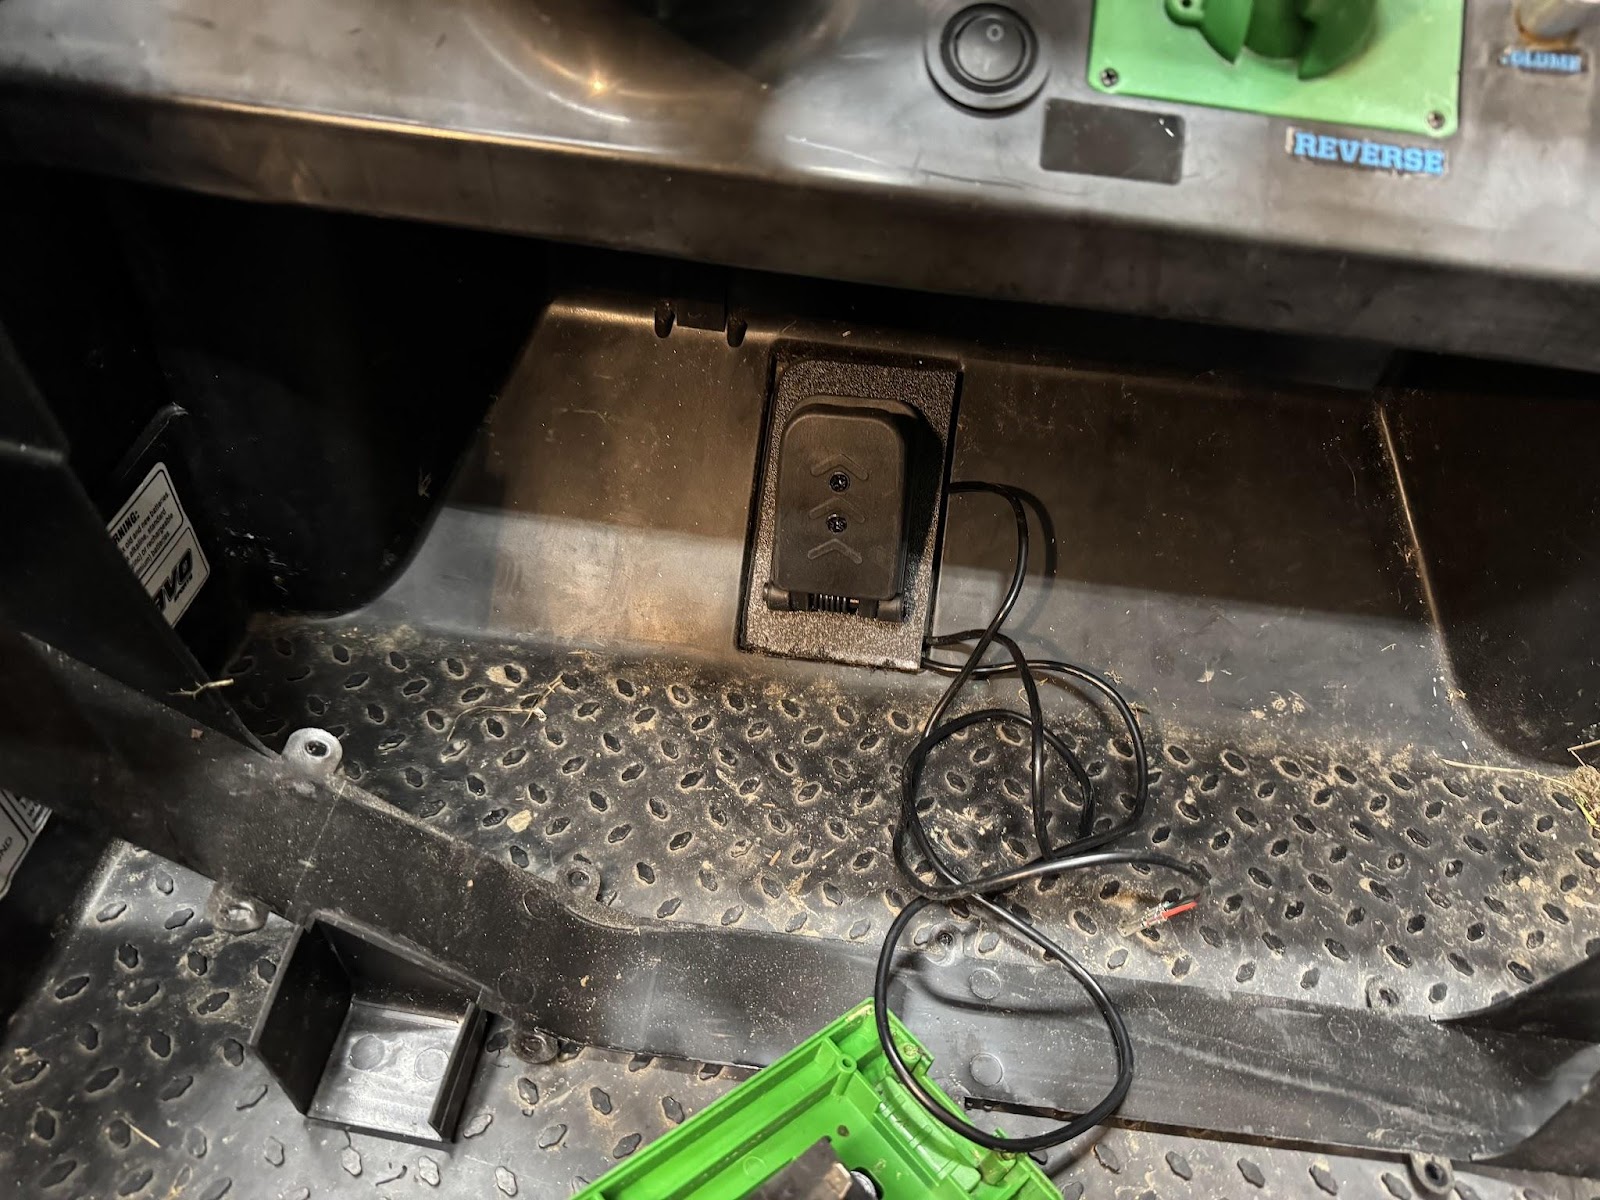
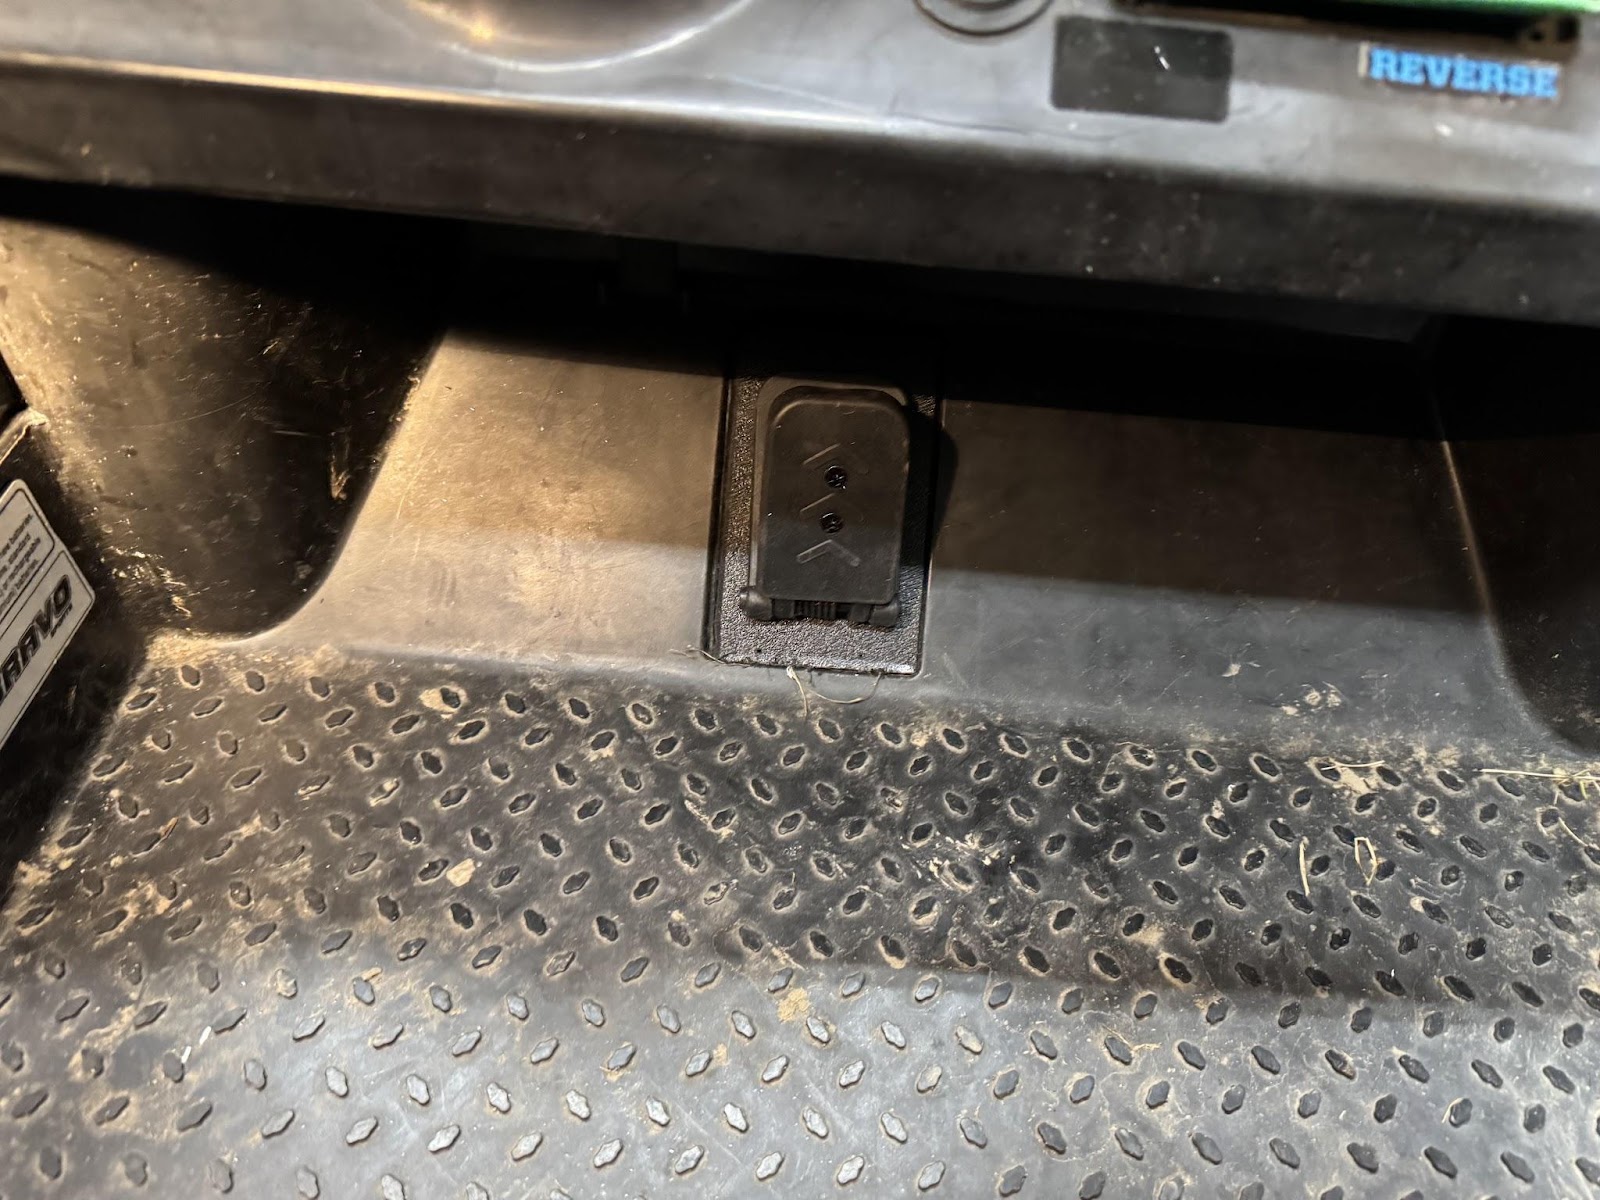
Looking at the dashboard, you may notice I replaced the stock green shifter with a simple 2-way switch. Some forums online discussed how the stock shifter has a tendency to melt with prolonged use at higher voltages. Combined with the fact that the idea of two different forward speeds doesn’t really make sense if you have an infinitely variable throttle. My son also requested that I add a phone holder. So, from left to right we now have the GPS speedometer, a new battery meter that works with 36V, below the battery meter is the master power switch, the new forward reverse switch (silver) and three toggle switches where stock buttons that used to trigger sounds used to live. The first (black) switch is a momentary toggle for the horn. The red switch is for the red lights (makes sense right) and the final yellow switch is for…
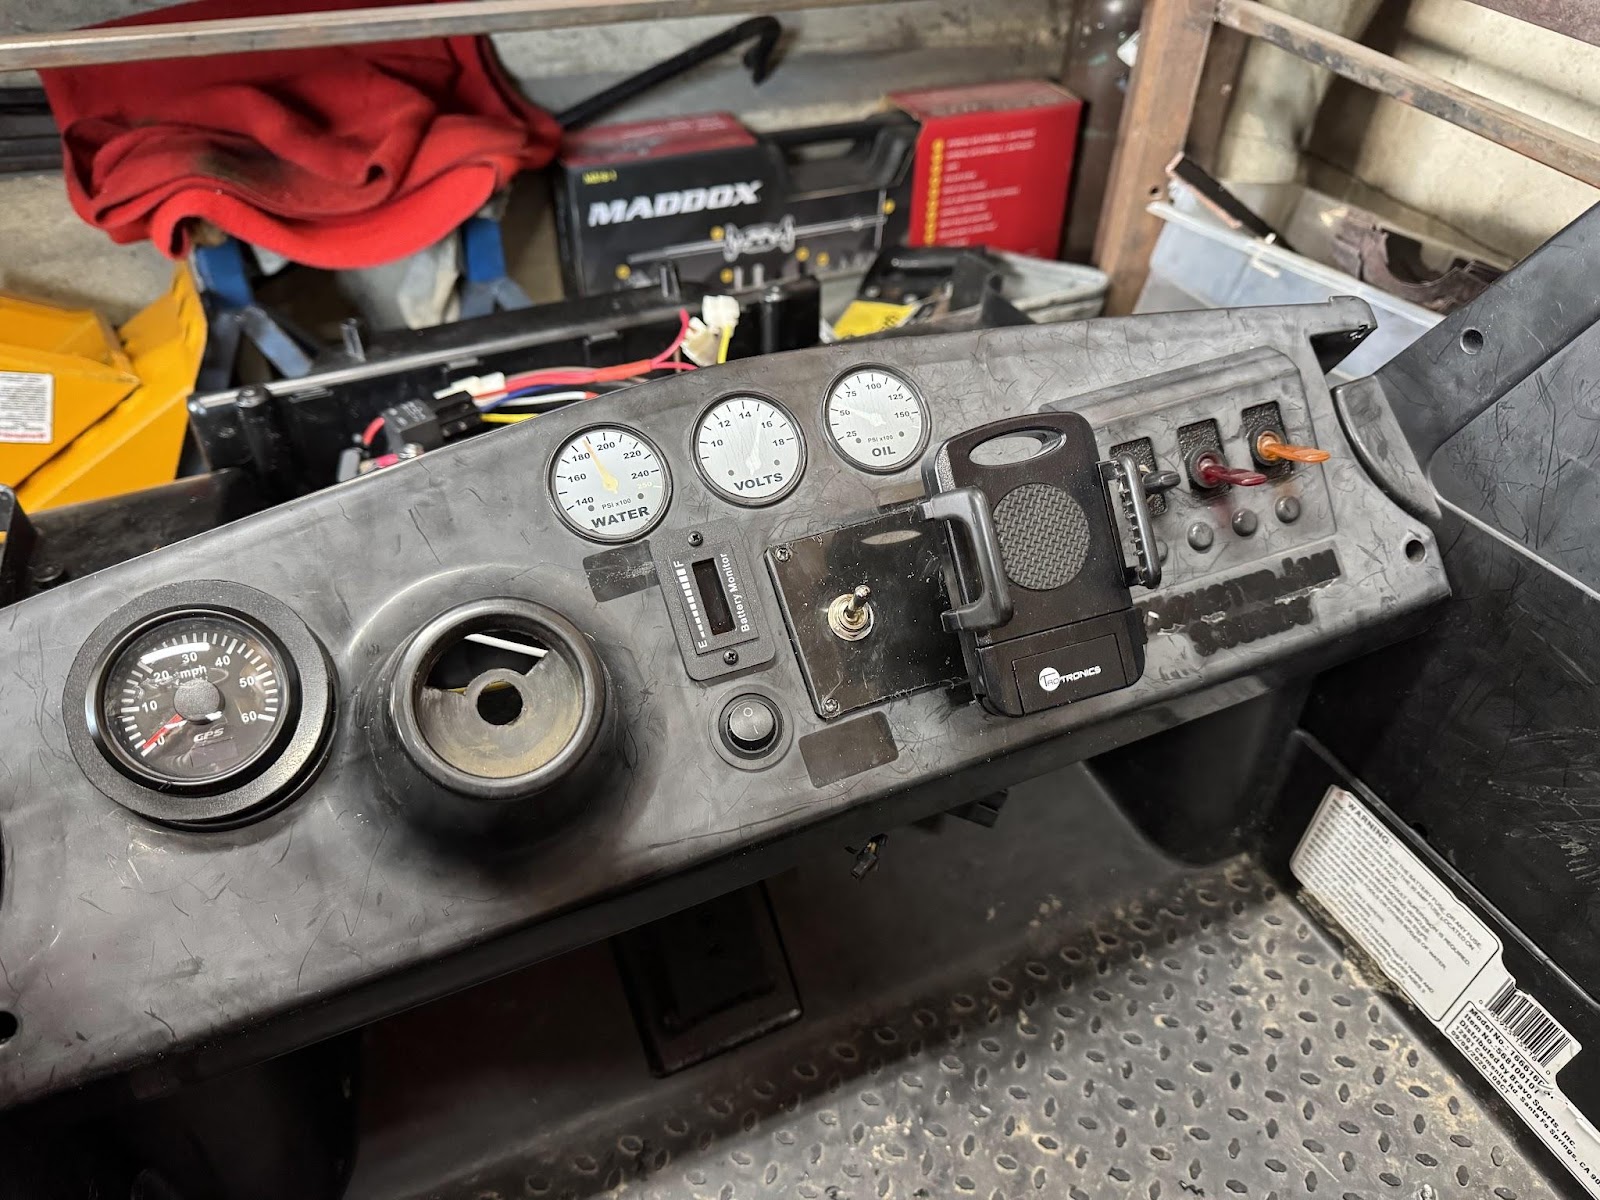
The green underglow.

If your kid’s power wheel doesn’t have underglow can you even claim you’re a good parent?
Now, at this point I could have been finished. I could have buttoned up the wiring, put everything back together and let my son drive Grave Digger more gingerly with the new throttle. Or I could do something to solve the issue of the plastic wheels once and for all.