Project Gave Digger: Chassis & Drivetrain
Using parts from a Razor ATV to make a custom swing arm for Grave Digger.
Continuing from last time, you may remember that I’m trying to find a way to replace the stock plastic wheels on my son’s Grave Digger Power Wheel with something more robust. The stock plastic wheels are failing and if Grave Digger has no wheels then it doesn’t matter how many lights, horns or speedometers it has, it’s not going anywhere.
Unlike most Power Wheels that are all plastic, Grave Digger has a steel frame. This is a big advantage because it provides a great platform to expand off of for modification, especially when it comes to addressing the issue with the wheels.

Do you know what other kid’s ride-on toy also have steel frames as well as real rubber tires and steel wheels? A Razor ATV. Pictured is a 24V Razor Dirt Quad that I found on FB marketplace for $200. I think these retail for ~$700 new so this was a fair deal. The Razor ATV is definitely not in pristine shape which is actually all the better for what I want to do with it.

From the factory, a Razor ATV has a one-piece rear swing arm that incorporates a motor with chain drive, disc brake and the axle. My plan was to use the rear swing arm from the Razor ATV and modify it to work with Grave Digger. Doing so would allow me to add real rubber tires to Grave Digger as well as a motor that already works at variable speed. Not to mention the addition of a real brake. I realize I could have fabricated a whole swing arm myself with off-the-shelf go kart components (wheels, tires, sprockets, brakes, etc.) but if you try to price all this stuff out individually, I guarantee you won’t be able to put it all together for $200 or less when you factor in the extra time it would take to start from scratch. This is part of the reason why I chose to go this route, everything I needed came in one package.

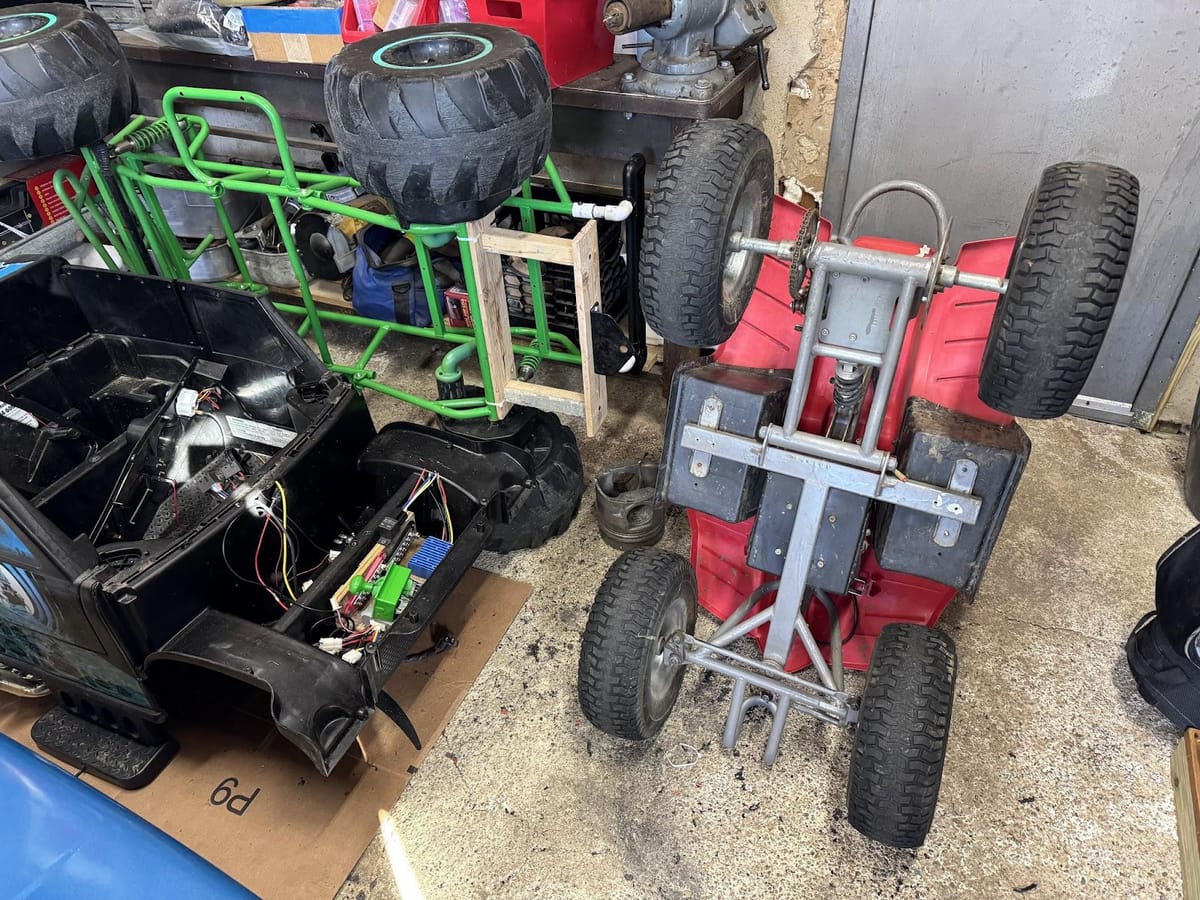
I took the swing-arm out of the Razor ATV, removed the stock swing-arm from Grave Digger, and started mocking things up.

The overall dimensions aren’t so far off. Obviously something needs to be done about the wheel offset.


But otherwise I felt like my plan was going to work.

I started taking some rough measurements to see what I was going to have to modify or build.

Here is what I ended up with. I started with a 4’ piece of 3/16” thick 1.5” x 1.5” angle iron from Home Depot. To increase the wheel offset I bought 20mm shaft from McMaster Carr, to replace the stock Razor ATV axle. I also bought 2 pillow block flange bearings to support the axle closer to the wheel mounting location. Here is the fame with everything tacked together and the Razor ATV swing-arm bolted in place.

And with the stock wheels and tires on.

The final piece of the new frame was building a way for it to bolt to Grave Digger's frame. There are four mounting points I need to account for. Two close to the wheels, where the rear shocks bolt and two closer to the center of the chassis, where the swing-arm pivots. I lined up Grave Digger’s stock frame with my fabricated frame to get a sense of where the pivot mounting points would have to be located. I happened to have some scrap, thick wall tubing of the right diameter that I used for this purpose.

With half of the mounting points fabricated, I bolted up my new swing-arm to Grave Digger to see how it fit.

I threw the body back on the chassis to get a sense of how it looked. In this picture the rear shocks are resting right on the axle with no offset.

With my new swing-arm bolted to Grave Digger I spaced out the body to get an estimate of how much I needed to offset the mounts for the rear shocks. I used the same 1.5” x 1.5” 3/16” angle iron and some other small off cuts to make the rear shock mounts.

I cleaned up my welds (as much as I cared to), prepped the new swing arm and painted it green.

With this major piece complete, we’re getting closer to putting Grave Digger back together.